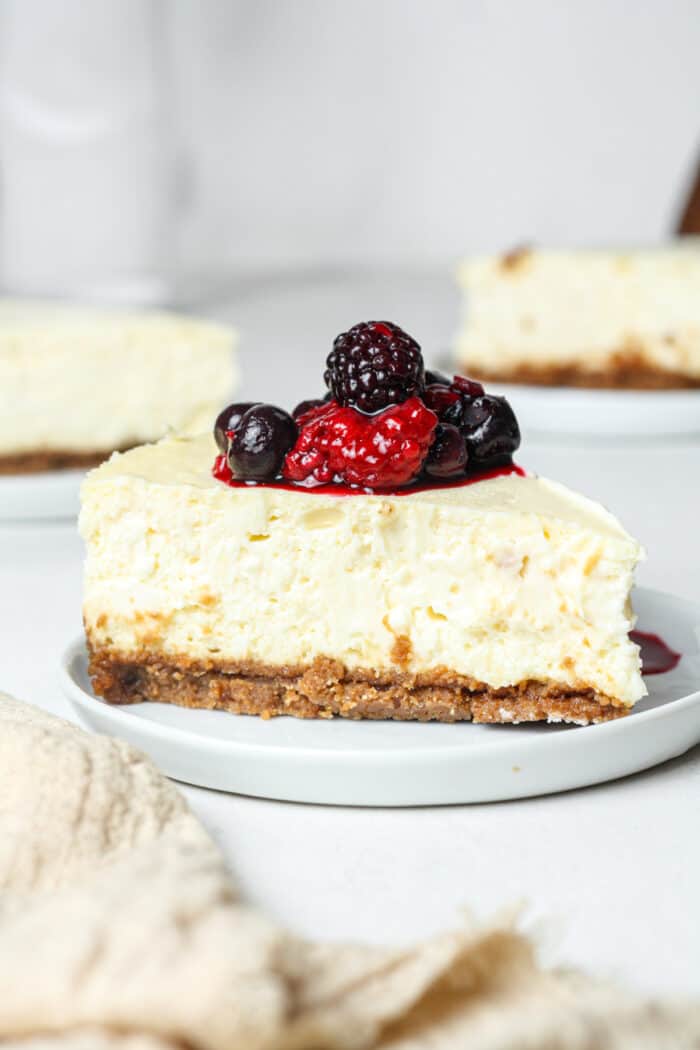
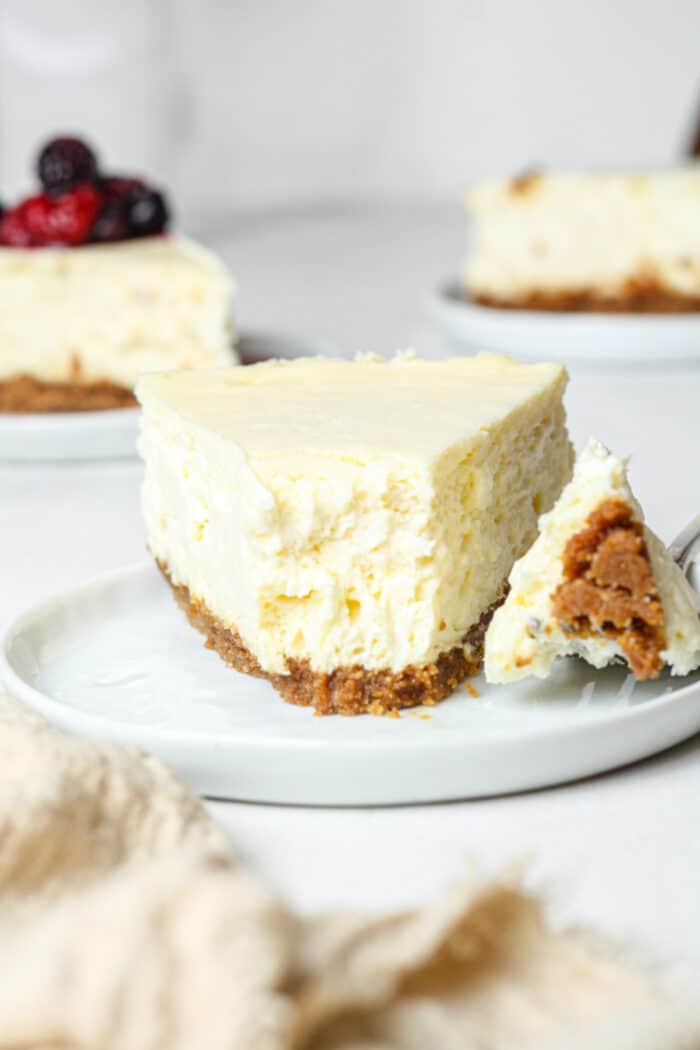
Gluten Free Cheesecake
This gluten free cheesecake is so smooth and creamy! This cheesecake features a crispy buttery graham cracker crust and the most decadent vanilla cheesecake filling. Great for holidays, birthdays, and more!
This recipe is sponsored by Pamela’s Products. Thank you for supporting my blog!
Why You’ll Love This Recipe
- This gluten free cheesecake is incredibly creamy.
- The cheesecake filling is made with only 6 ingredients.
- The gluten free graham cracker crust is buttery and crunchy.
- The crust is made with only 3 ingredients.
- This cheesecake is rich and decadent!
- Try this Oreo Cheesecake or this Peanut Butter Cheesecake too!
- This recipe is gluten free.
- Check out this Gluten Free Graham Cracker Crust for more tips and tricks when making the crust.
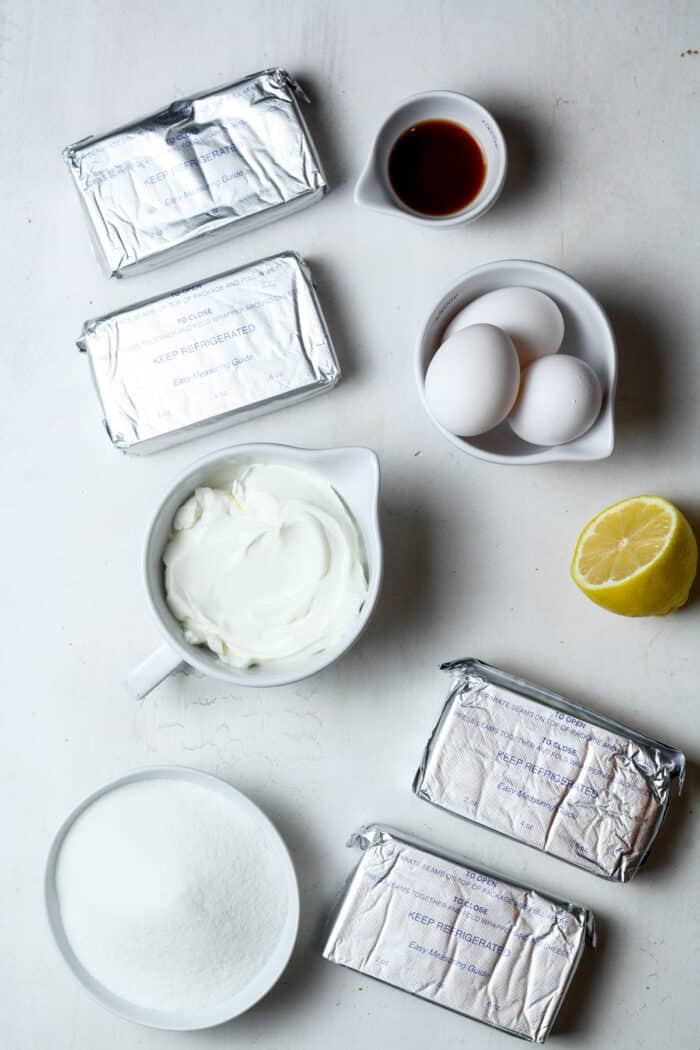
Ingredients & Substitutions
These are the main ingredients and substitutions for gluten free cheesecake. Scroll down to the recipe card for full ingredients list and instructions.
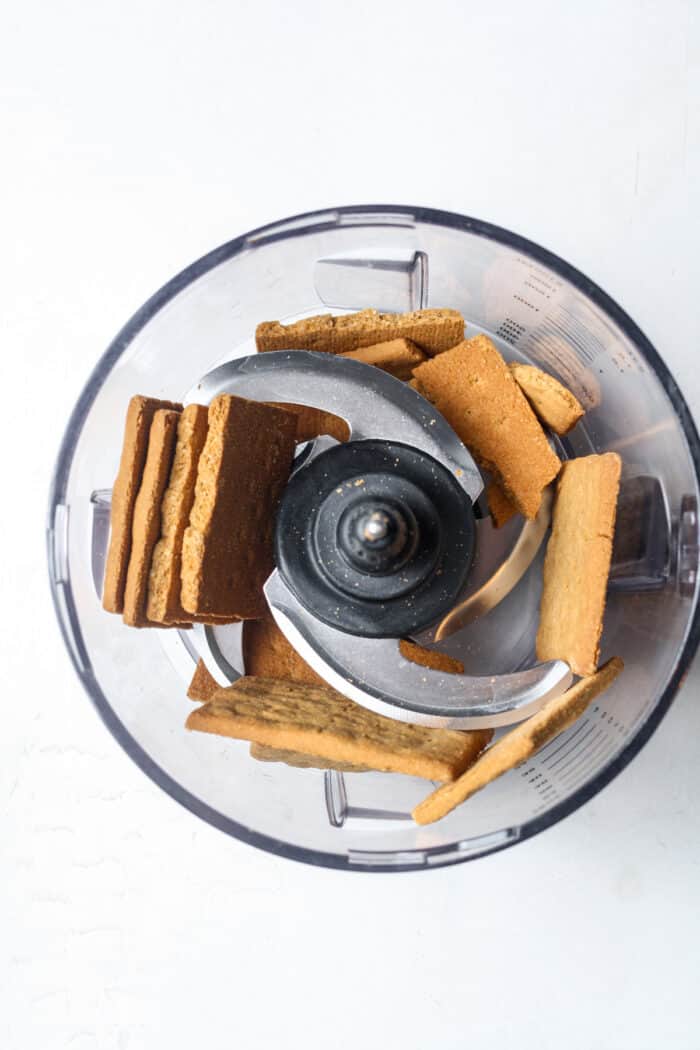
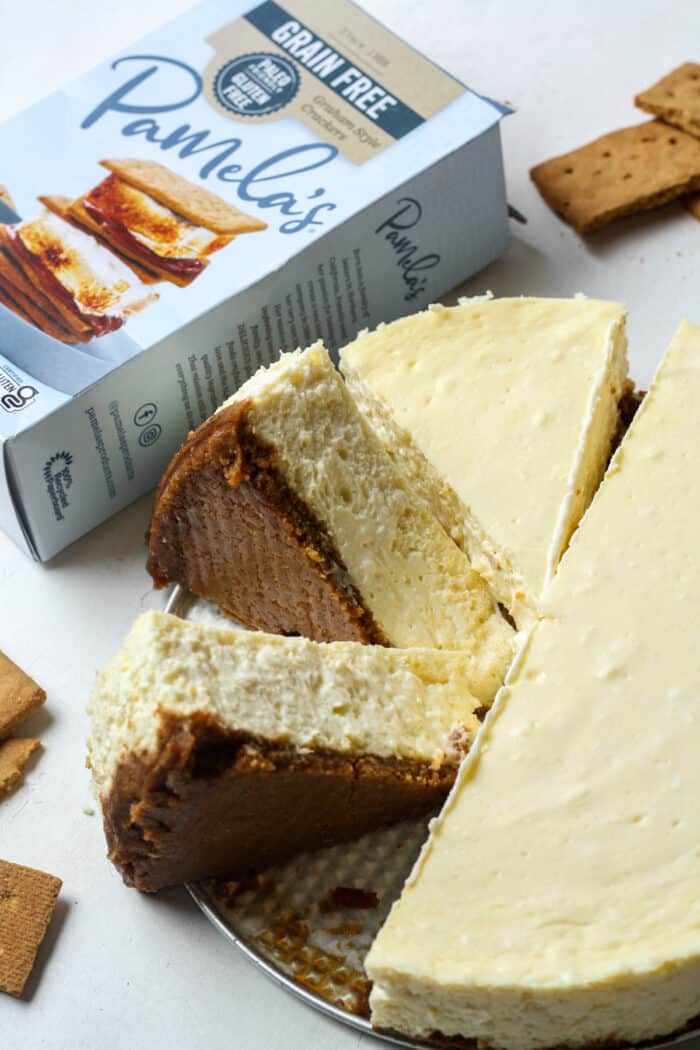
Gluten free graham crackers are at the heart of the crust. I used and loved Pamela’s grain free graham crackers. Process graham crackers into crumbs before measuring out the 1 ¾ cups. You could also make your own Homemade Graham Crackers.
Melted butter helps bind the crust together.
A little granulated sugar adds some sweetness to the cheesecake crust and to the filling.
Use room temperature cream cheese. This is vital! Cold cream cheese will leave clumps of cream cheese throughout the cheesecake. I have tested this with light cream cheese and full fat. Both work, but full fat adds more creaminess.
Sour cream adds a great slightly tart flavor. In addition, it provides even more creaminess.
Vanilla extract adds a nice vanilla flavor to the filling.
Lemon juice provides slight tartness. Lemon flavor is not detectable in the end result.
The eggs are important in the filling. Do not substitute for the eggs.
How to Prevent Cheesecake Cracks
Here are some tips and tricks to prevent cracks in cheesecake.
Use room temperature cream cheese. This is very important in achieving a creamy filling without cracks.
Over mixed eggs may result in a cracked cheesecake. Try to avoid mixing eggs too much. Mix until just incorproated.
Cook your cheesecake in a springform pan.
In addition, use the water bath method as outlined below. This allows the heat to cook the cheesecake more evenly, resulting in fewer cracks.
Allow the cheesecake to cool down in the oven after baking. Slightly open oven door and turn off heat. This allows the cheesecake to slowly cool down, rather than quickly chilling.
These are the tips I use to prevent cracks in cheesecakes. If your cheesecake does crack, it is not the end of the world! Add some whipped cream, berries or chocolate sauce on top.
Taste & Texture
This gluten free cheesecake tastes like classic vanilla cheesecake. The crust tastes like buttery graham crackers.
This cheesecake filling is so creamy! The crust is crunchy and crispy.
How to Make
Step 1
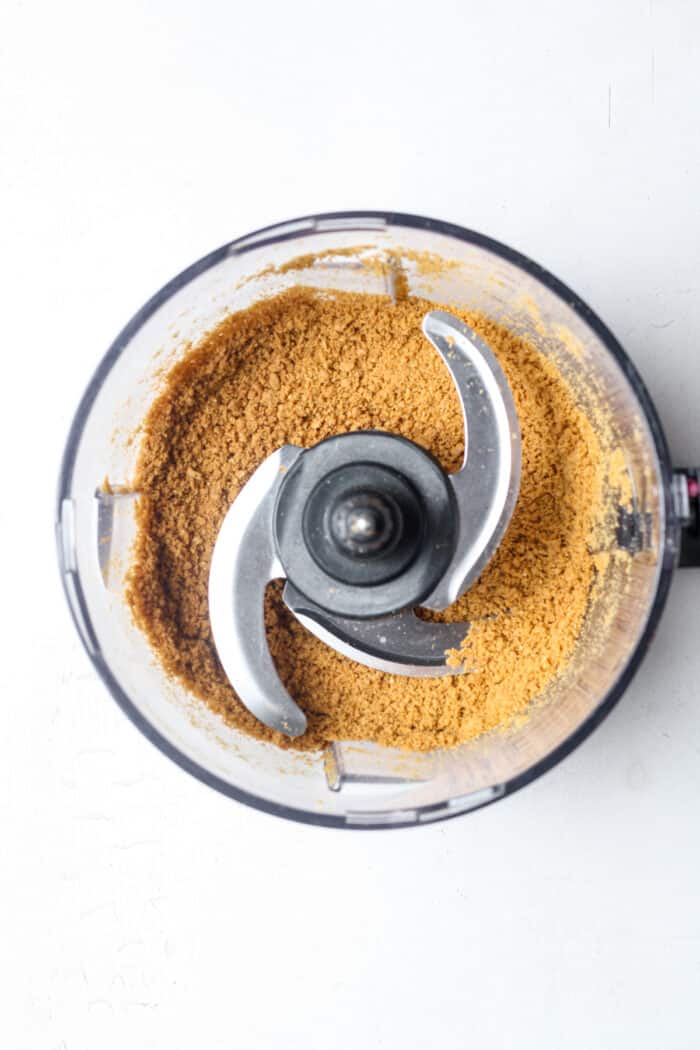
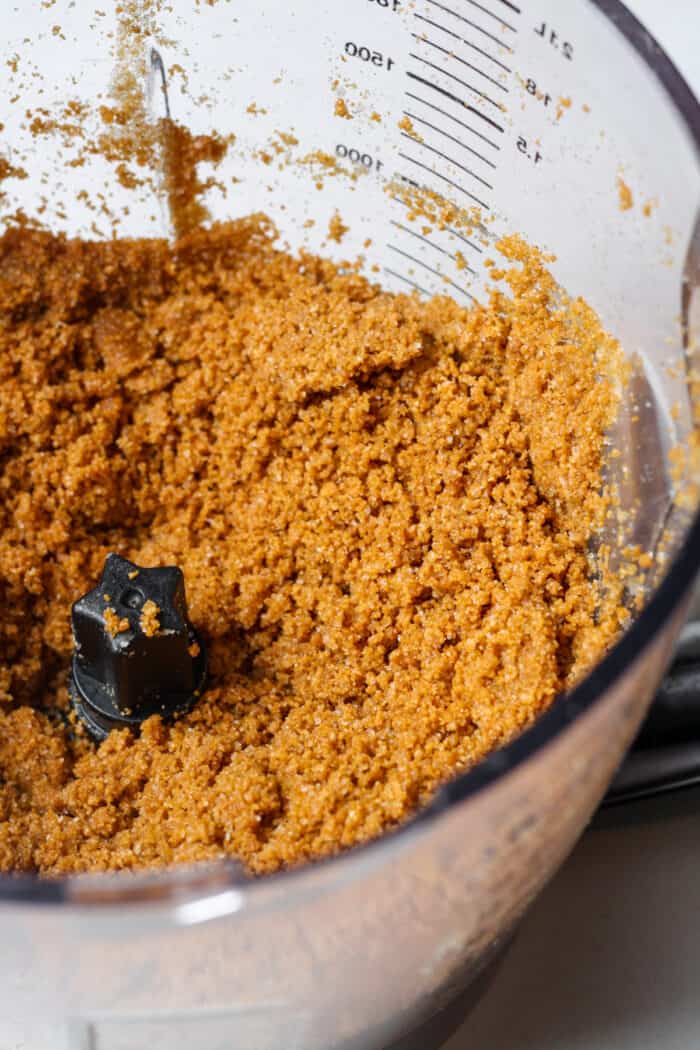
First, preheat oven to 350 degrees Fahrenheit. Make graham cracker crust. Add graham crackers to a food processor. Process until they become crumbs. Then measure out the 1 ¾ cups.
Step 2
Add graham cracker crumbs, melted butter and sugar back to food processor. Process until combined. If you press some of the crumbles between two fingers, it should lightly stick together.
Step 3
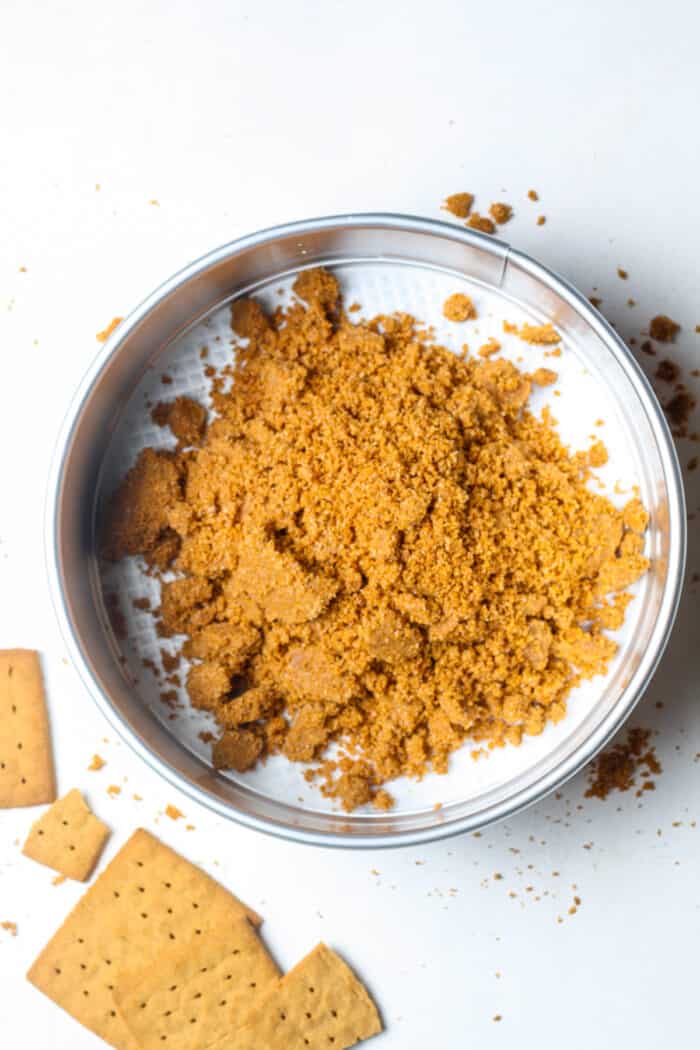
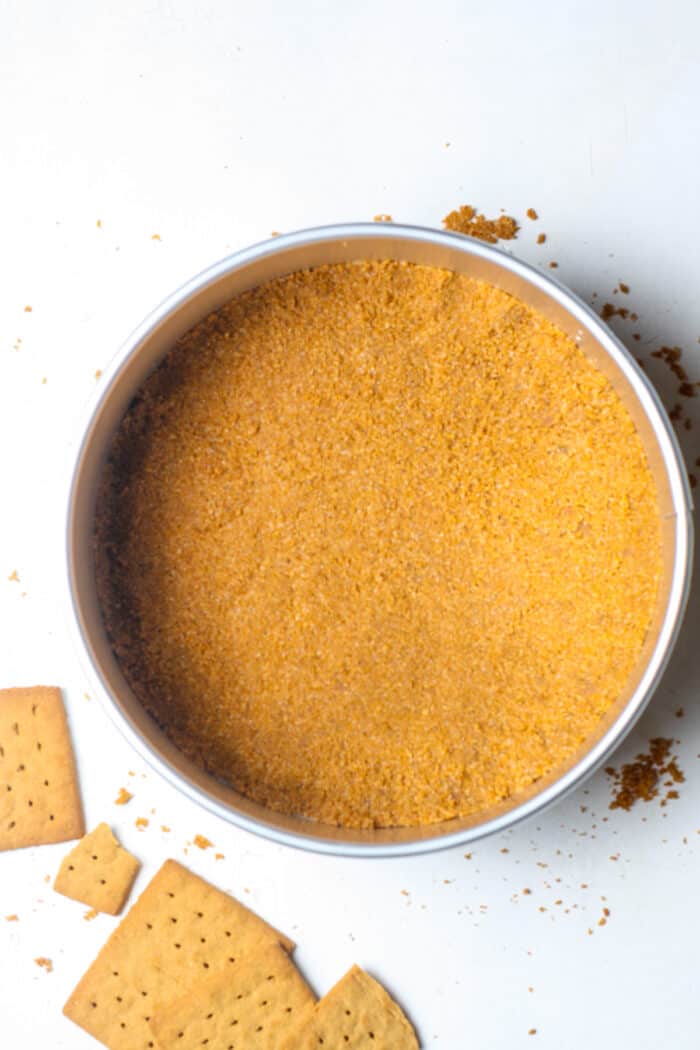
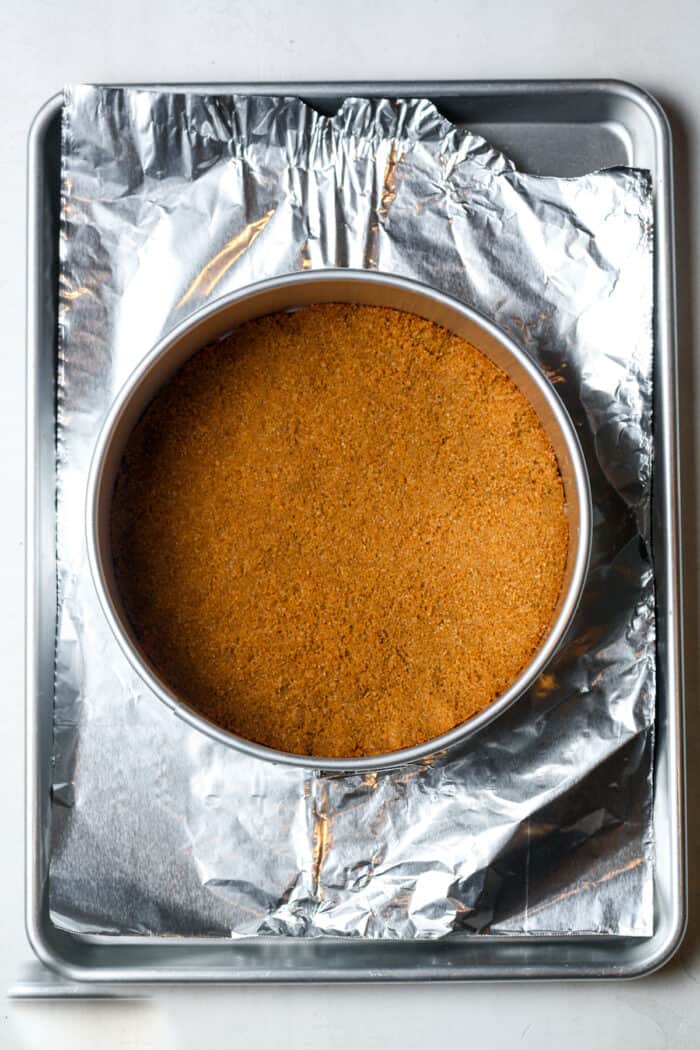
Line bottom of springform pan with parchment paper. Spread the crumbly mixture down into pan. Use fingers or bottom of cup to press into one even layer.
Step 4
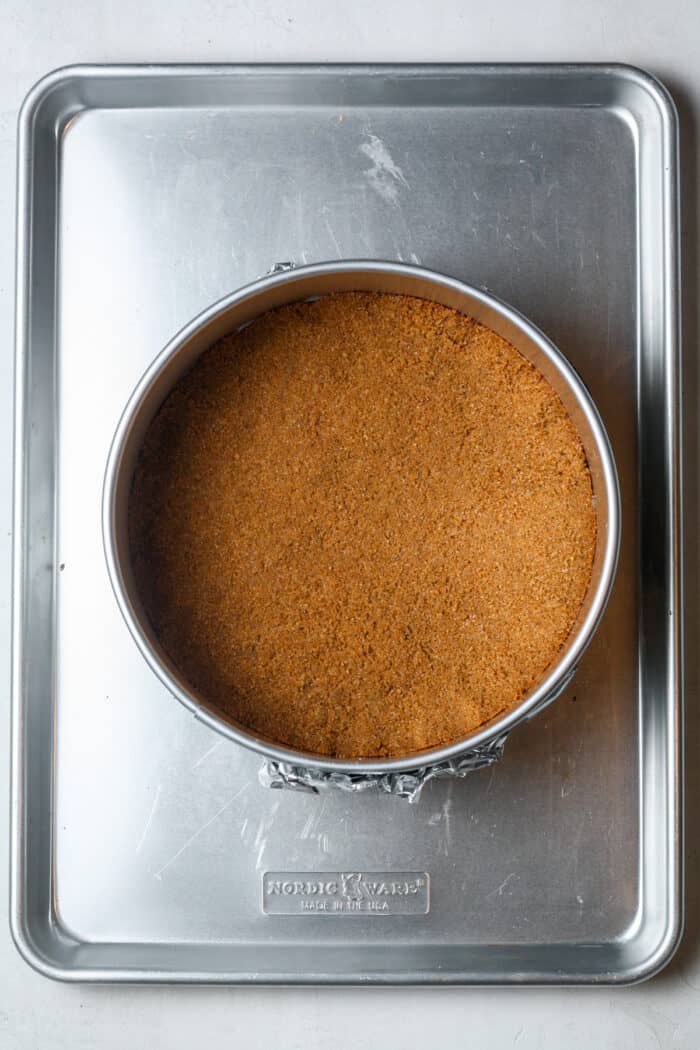
Then, bake for 8 minutes. Remove from oven and set aside while you make the cheesecake filling.
Step 5
Add 2 cups of water to a pot and bring to a boil.
Step 6
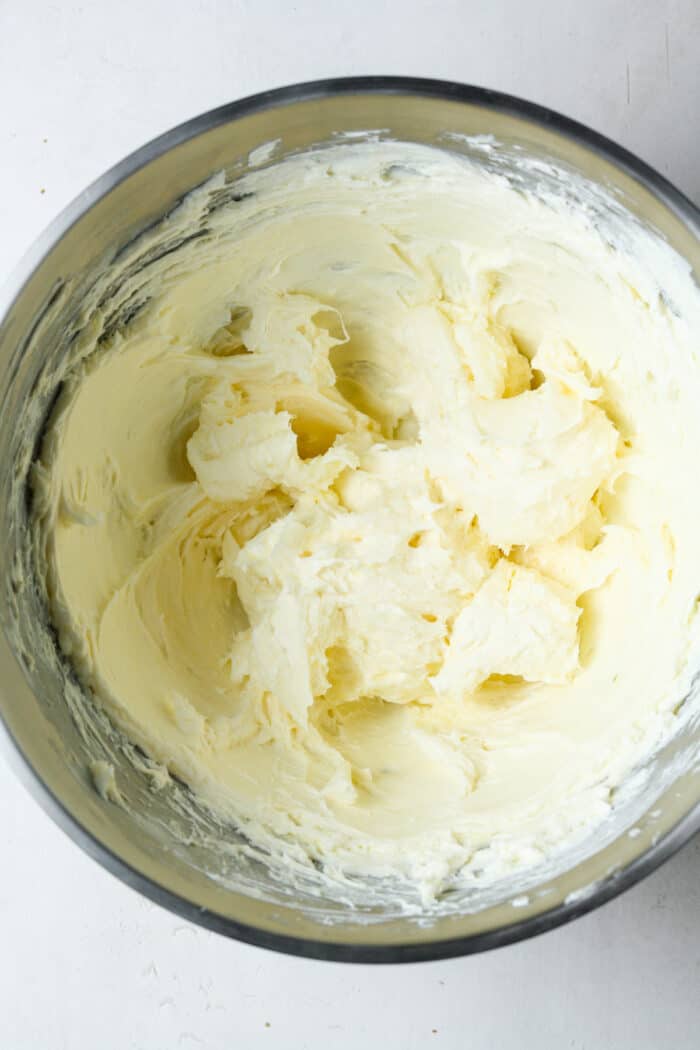
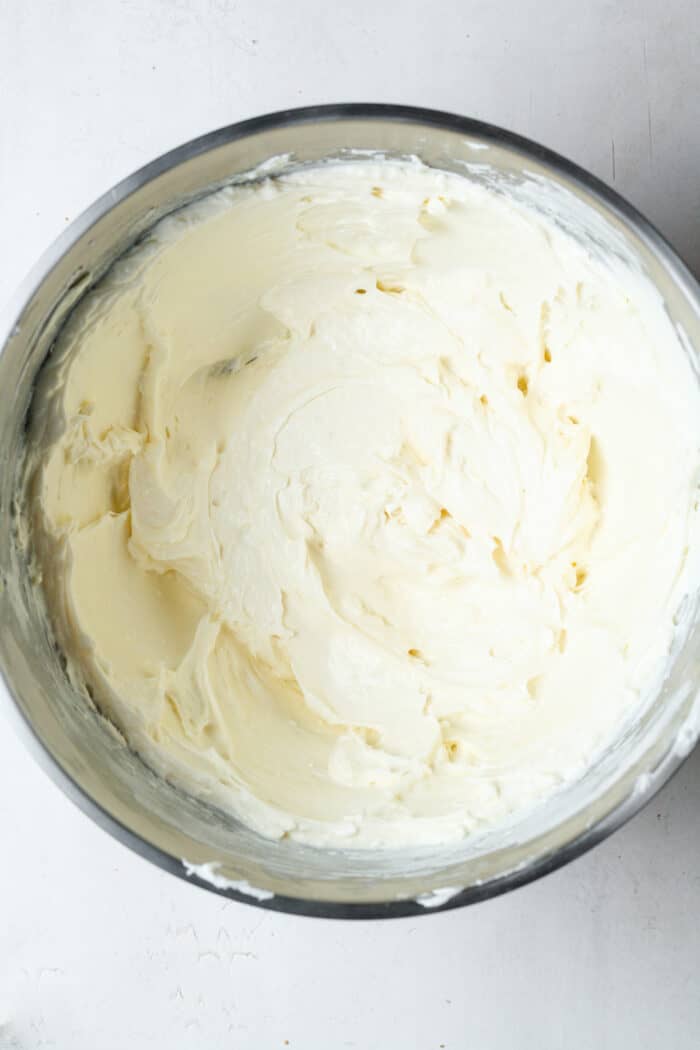
While the water boils, make cheesecake filling. Add room temperature cream cheese to stand mixer. Beat until creamy.
Step 7
Then, add in sour cream, sugar, vanilla extract and lemon juice. Beat until combined and no clumps of cream cheese remain.
Step 8
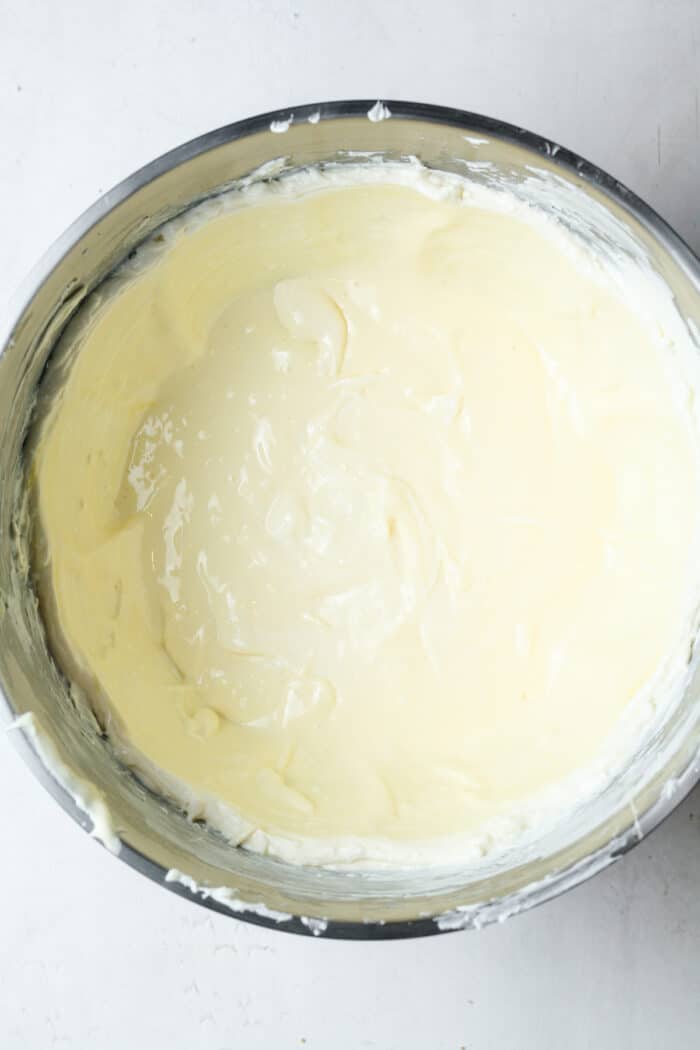
Add in eggs. Stir until just combined. Do not over mix.
Step 9
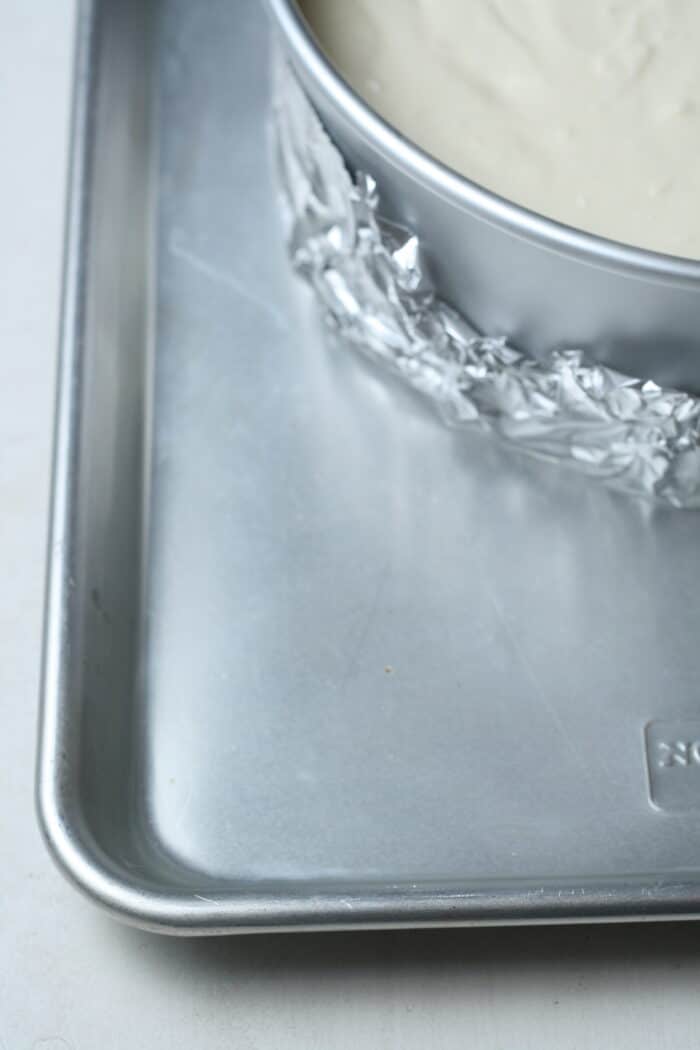
Take a large piece of aluminum foil and wrap it around the bottom and edges of springform pan.
Step 10
Pour cheesecake filling into springform pan. Then, smooth out the top with a spatula.
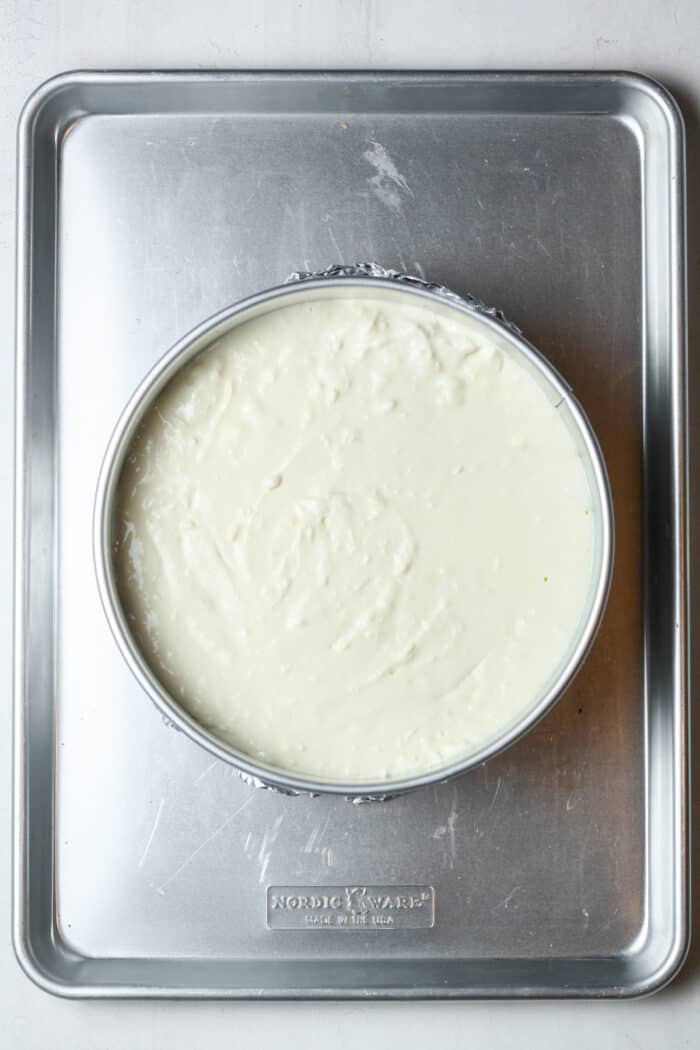
Step 11
Prepare water bath. Place springform pan in the middle of a large roasting pan with edges. Carefully and slowly pour the boiling water in the roasting pan so that it comes up along the edges of the springform pan.
Step 12
Place pan in oven and bake for 1 hour at 350 degrees Fahrenheit. Cheesecake is done when it is slightly jiggly when shaken. It will firm up slightly as it cools. If the middle is still raw, bake for another 5 minutes and check again.
Step 13
Once cheesecake is done, turn oven heat off. Crack open your oven slightly and allow the cheesecake to cool done for 1 hour in the oven.
Step 14
Carefully remove cheesecake from water bath in the oven. Allow it cool for 2 hours at room temperature. Then, loosely top with tin foil and refrigerate for at least 4 hours up to overnight.
Step 15
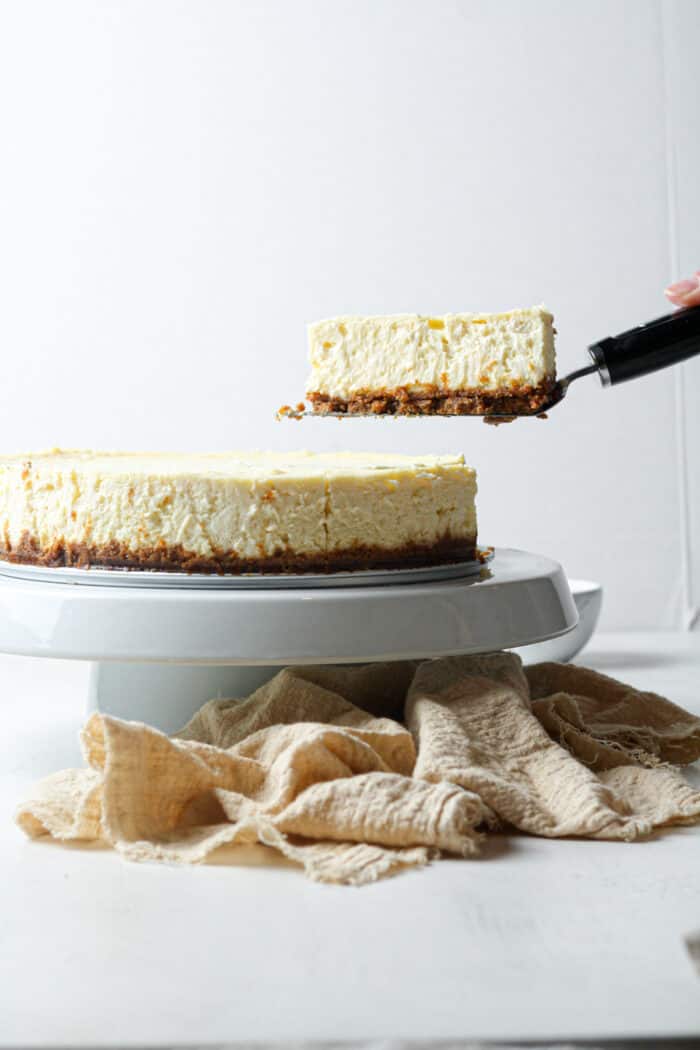
When completely chilled, use a large knife to loosen the cheesecake from the edges of the pan. Open up springform pan.
Step 16
Use a sharp knife to slice and serve. I like to dip my knife in warm water before each slice to get precise cuts.
Expert Tips & Tricks
For best results, follow this gluten free cheesecake recipe exactly.
Use room temperature cream cheese to prevent cracks. No clumps of cream cheese should remain in the filling batter.
Avoid over mixing the batter once eggs have been added. Mix until just combined.
Be sure to wrap a piece of tin foil around the bottom of the springform pan. This prevents the water bath from seeping into the cheesecake.
Bake until cheesecake is still a little wobbly when shaken.
Allow cheesecake to cool down for an hour in the oven with the door slightly cracked. This allows the cheesecake to cool down slowly, thus preventing cracks.
When slicing the cheesecake, use a sharp knife. Run the knife under warm water before each cut for precise cutting.
Water Bath
The water bath yields an extra creamy texture. Without the water bath, cheesecake can become rubbery.
To make a water bath, boil at least 2 cups of water.
Place springform pan containing cheesecake in the bottom of a ridged roasting pan. Carefully and slowly pour boiling water down into roasting pan.
The water should come up at least 1 inch on the outside of the springform pan.
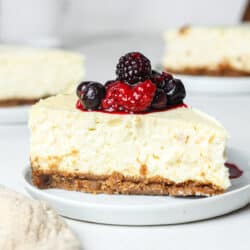
Toppings
This cheesecake is a great blank slate for your favorite toppings!
Fresh berries
Whipped cream
Caramel sauce
Melted chocolate
Pecan halves
Oreo crumbles
Or, try this Chocolate Chip Cheesecake!
How to Serve & Store
Serve gluten free cheesecake once completely chilled and sliced. It pairs well with the above mentioned toppings.
Store leftovers in the fridge for up to 3 days.
This cheesecake freezes really well! Wrap individual slices before freezing.
Frequently Asked Questions
Cheesecake is usually not gluten free. Typically, the crust contains gluten or wheat and the filling sometimes is thickened with flour.
Sometimes yes and sometimes no. Cheesecake filling is sometimes thickened with flour, making it not gluten free.
Yes! Wrap slices and freeze for up to 2 months.
Slice with a sharp knife. Rinse knife under warm water between each slice.
You May Also Like
If you make this gluten free cheesecake recipe, I would really appreciate a review! You can find me on Instagram, Facebook, and Pinterest. I would love for you to follow along! For more ideas, check out these Dessert Recipes.
Get the Recipe: Gluten Free Cheesecake
Ingredients
Graham Cracker Crust
- 1 ¾ cups gluten free graham cracker crumbs
- 6 tbsp melted butter
- 3 tbsp granulated sugar
Cheesecake
- 32 ounces room temperature cream cheese
- 1 cup sour cream
- ¾ cup granulated sugar
- 2 tsp vanilla extract
- 1 tsp lemon juice
- 3 eggs
Instructions
- First, preheat oven to 350 degrees Fahrenheit. Make graham cracker crust. Add graham crackers to a food processor. Process until they become crumbs. Then measure out 1 ¾ cups.
- Add graham cracker crumbs, melted butter and sugar back to food processor. Process until combined. If you press some of the crumbles between two fingers, it should lightly stick together.
- Line bottom of springform pan with parchment paper. Spread the crumbly mixture down into pan. Use fingers or bottom of cup to press into one even layer.
- Bake for 8 minutes. Remove from oven and set aside while you make the cheesecake filling.
- Add 2 cups of water to a pot and bring to a boil.
- While the water boils, make cheesecake filling. Add room temperature cream cheese to stand mixer. Beat until creamy.
- Then, add in sour cream, sugar, vanilla extract and lemon juice. Beat until combined and no clumps of cream cheese remain.
- Add in eggs. Stir until just combined. Do not over mix.
- Take a large piece of aluminum foil and wrap it around the bottom and edges of springform pan. This prevents the water from seeping into the cheesecake while baking.
- Pour cheesecake filling into springform pan. Smooth out the top with a spatula.
- Prepare water bath. Place springform pan in the middle of a large roasting pan with edges. Carefully and slowly pour the boiling water in the roasting pan so that it comes up along the edges of the springform pan. See photos above for reference.
- Place pan in oven and bake for 1 hour at 350 degrees Fahrenheit. Cheesecake is done when it is slightly jiggly when shaken. It will firm up slightly as it cools. If the middle is still raw, bake for another 5 minutes and check again.
- Once cheesecake is done, turn oven heat off. Crack open your oven slightly and allow the cheesecake to cool done for 1 hour in the oven.
- Carefully remove cheesecake from water bath in the oven. Allow it cool for 2 hours at room temperature. Then, loosely top with tin foil and refrigerate for at least 4 hours up to overnight.
- When completely chilled, use a large knife to loosen the cheesecake from the edges of the pan. Open up springform pan.
- Use a sharp knife to slice and serve. I like to dip my knife in warm water before each slice to get precise cuts.
Notes
- See blog post above for helpful tips, tricks and photos.
- Cheesecake is not a forgivable dessert, therefore I do not recommend any changes to this recipe.
- Store cheesecake in the fridge for up to 3 days.
- This cheesecake freezes well! Wrap individual slices and freeze for up to 2 months. Defrost before eating.
Love this gluten free cheesecake? You can sign up here to receive healthy meal plans, exclusive new recipes and updates!
6 Comments on “Gluten Free Cheesecake”
What size springform pan do you use?
I use a 9 inch springform pan. Enjoy!
Delicious! Turned out perfectly! Making again today for my son’s bday tomorrow 🙂
I am so glad to hear that! Happy birthday to your son!
Incredibly delicious. I have to make this today!
This recipe is amazing. The cheesecake turned out perfect!